TUTORIAL – Playing DS_LOA Online using IP Address Method
| Submitted by mirroreduser on Thu, 2021-05-06 15:12 | |||||||||||||||||||||||||
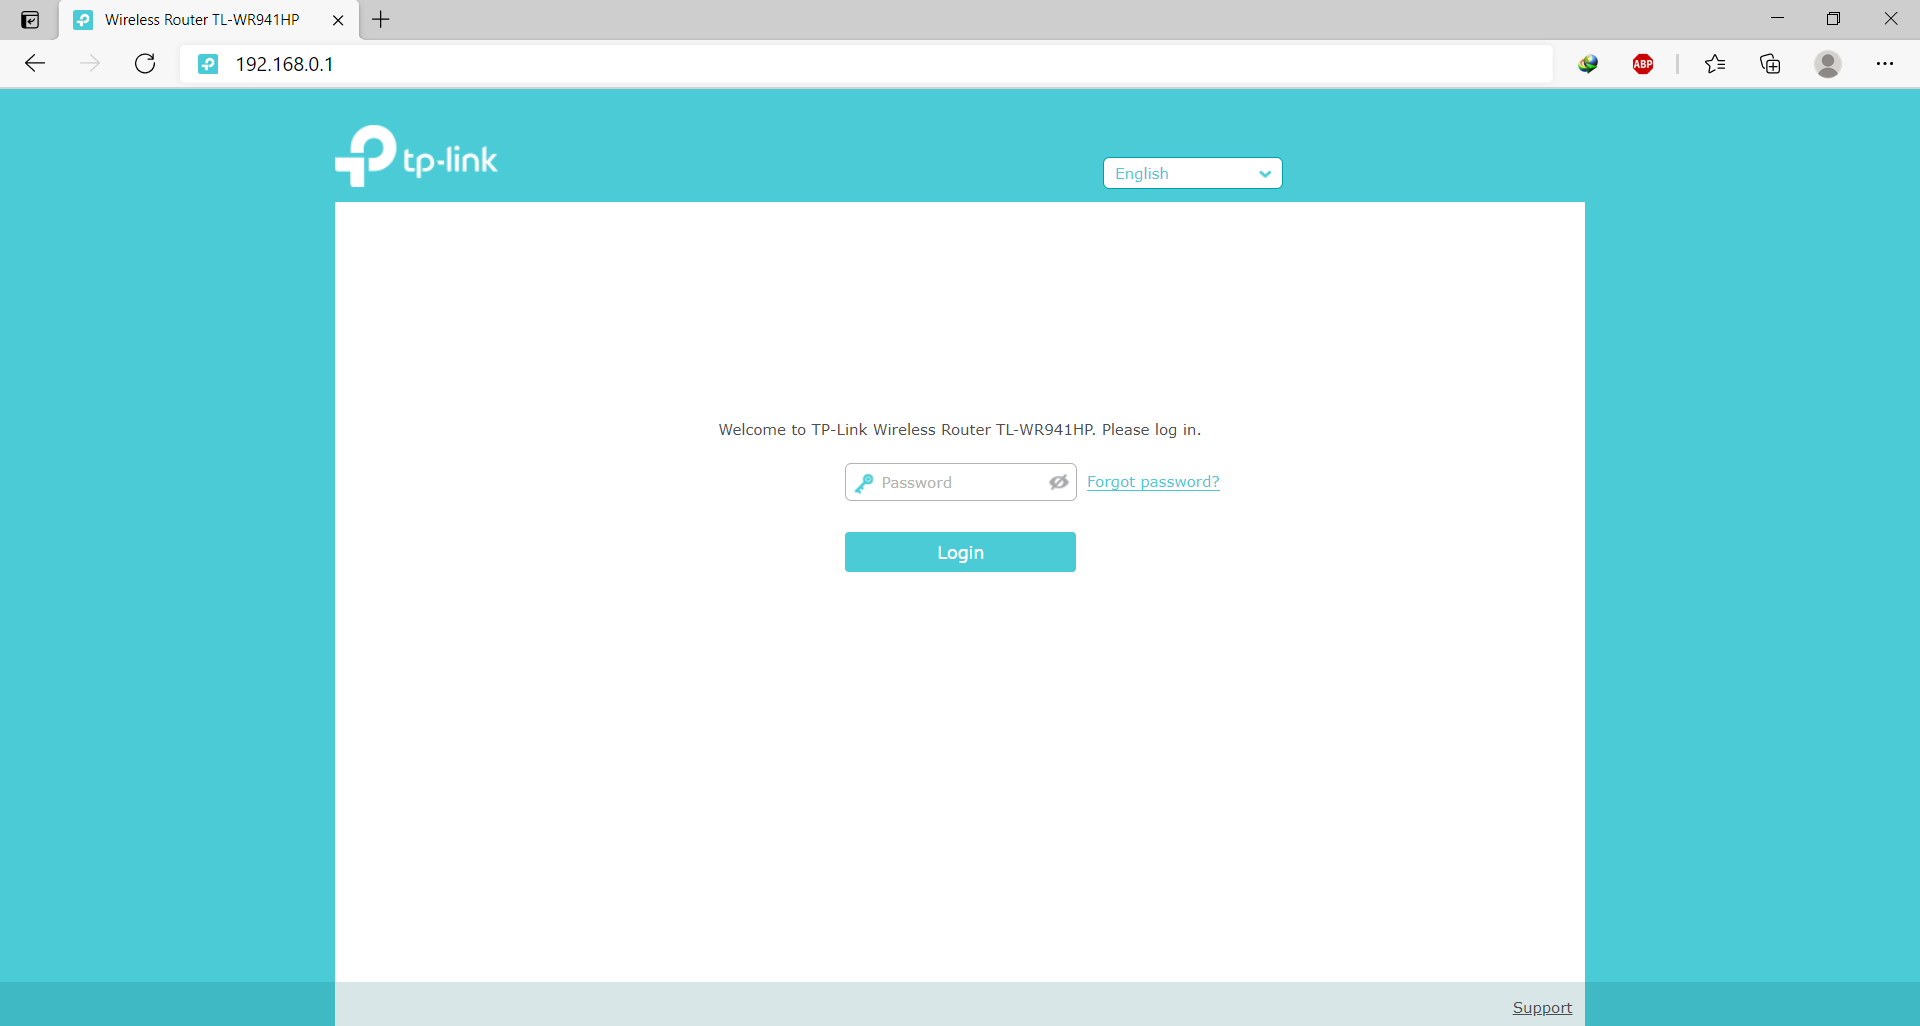
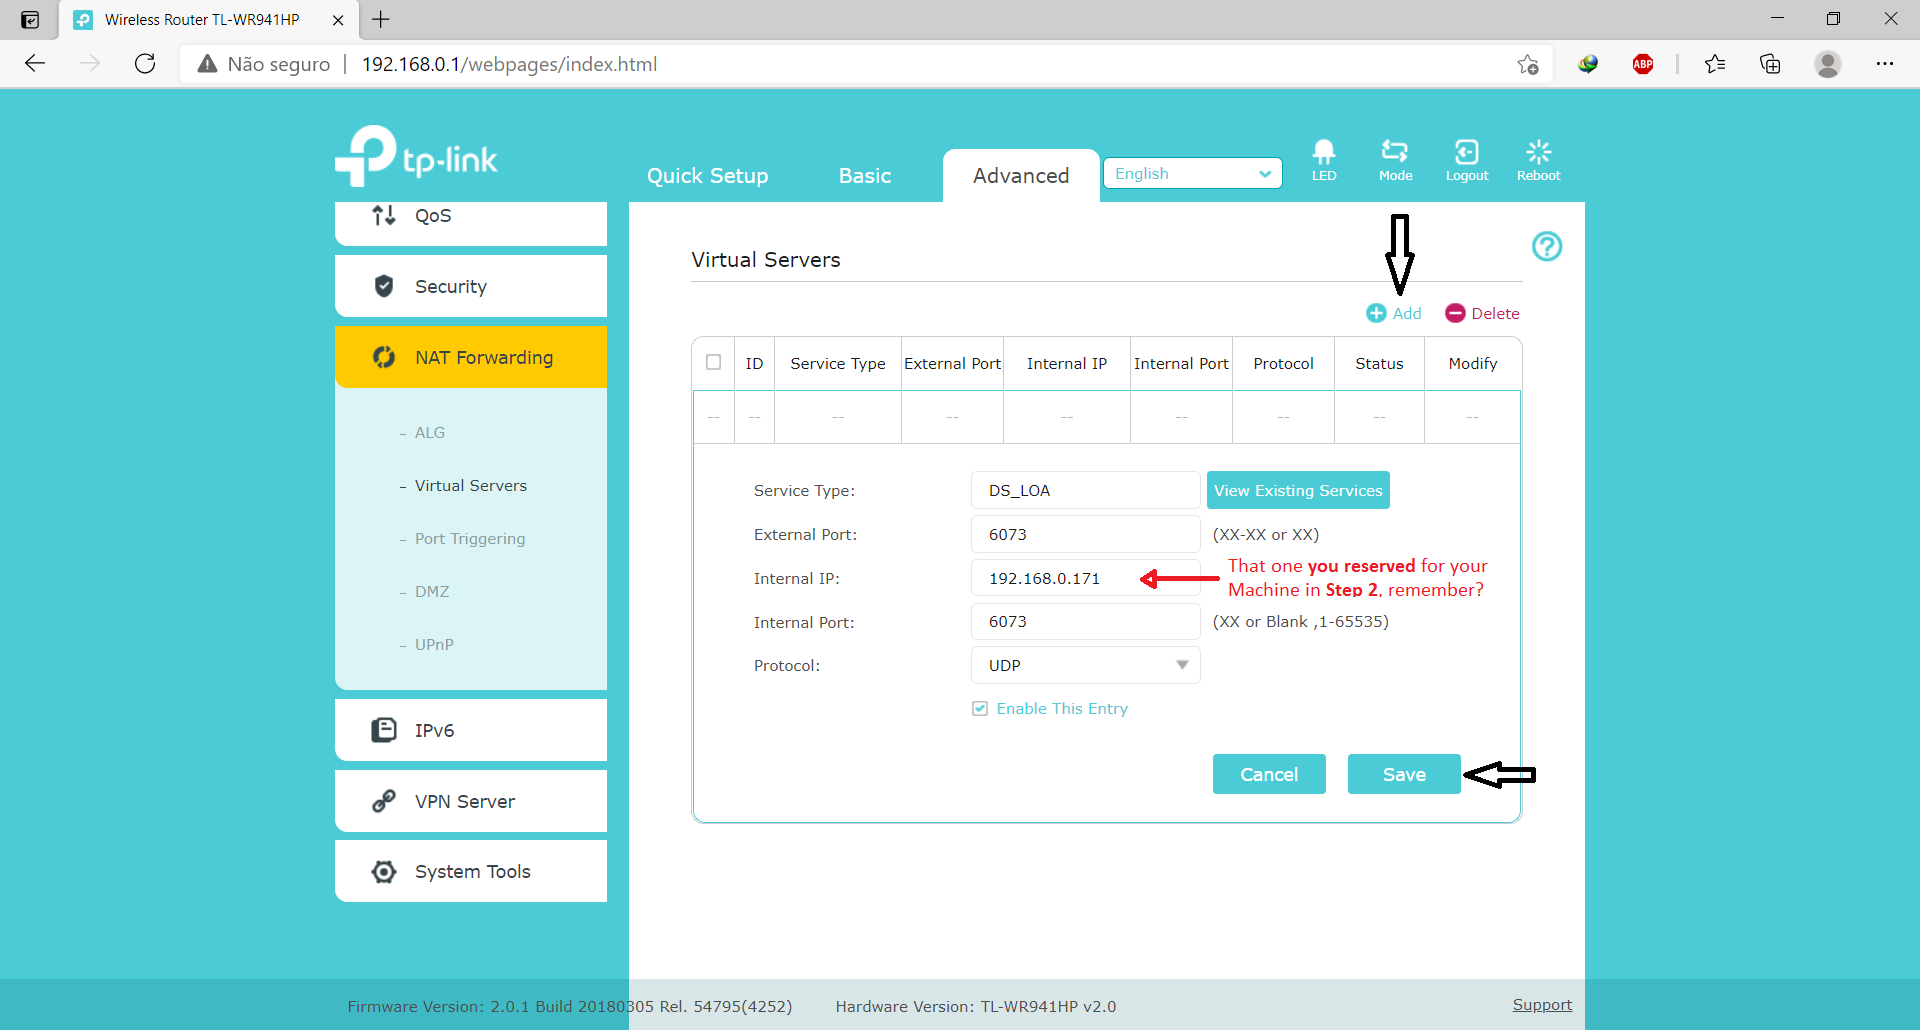
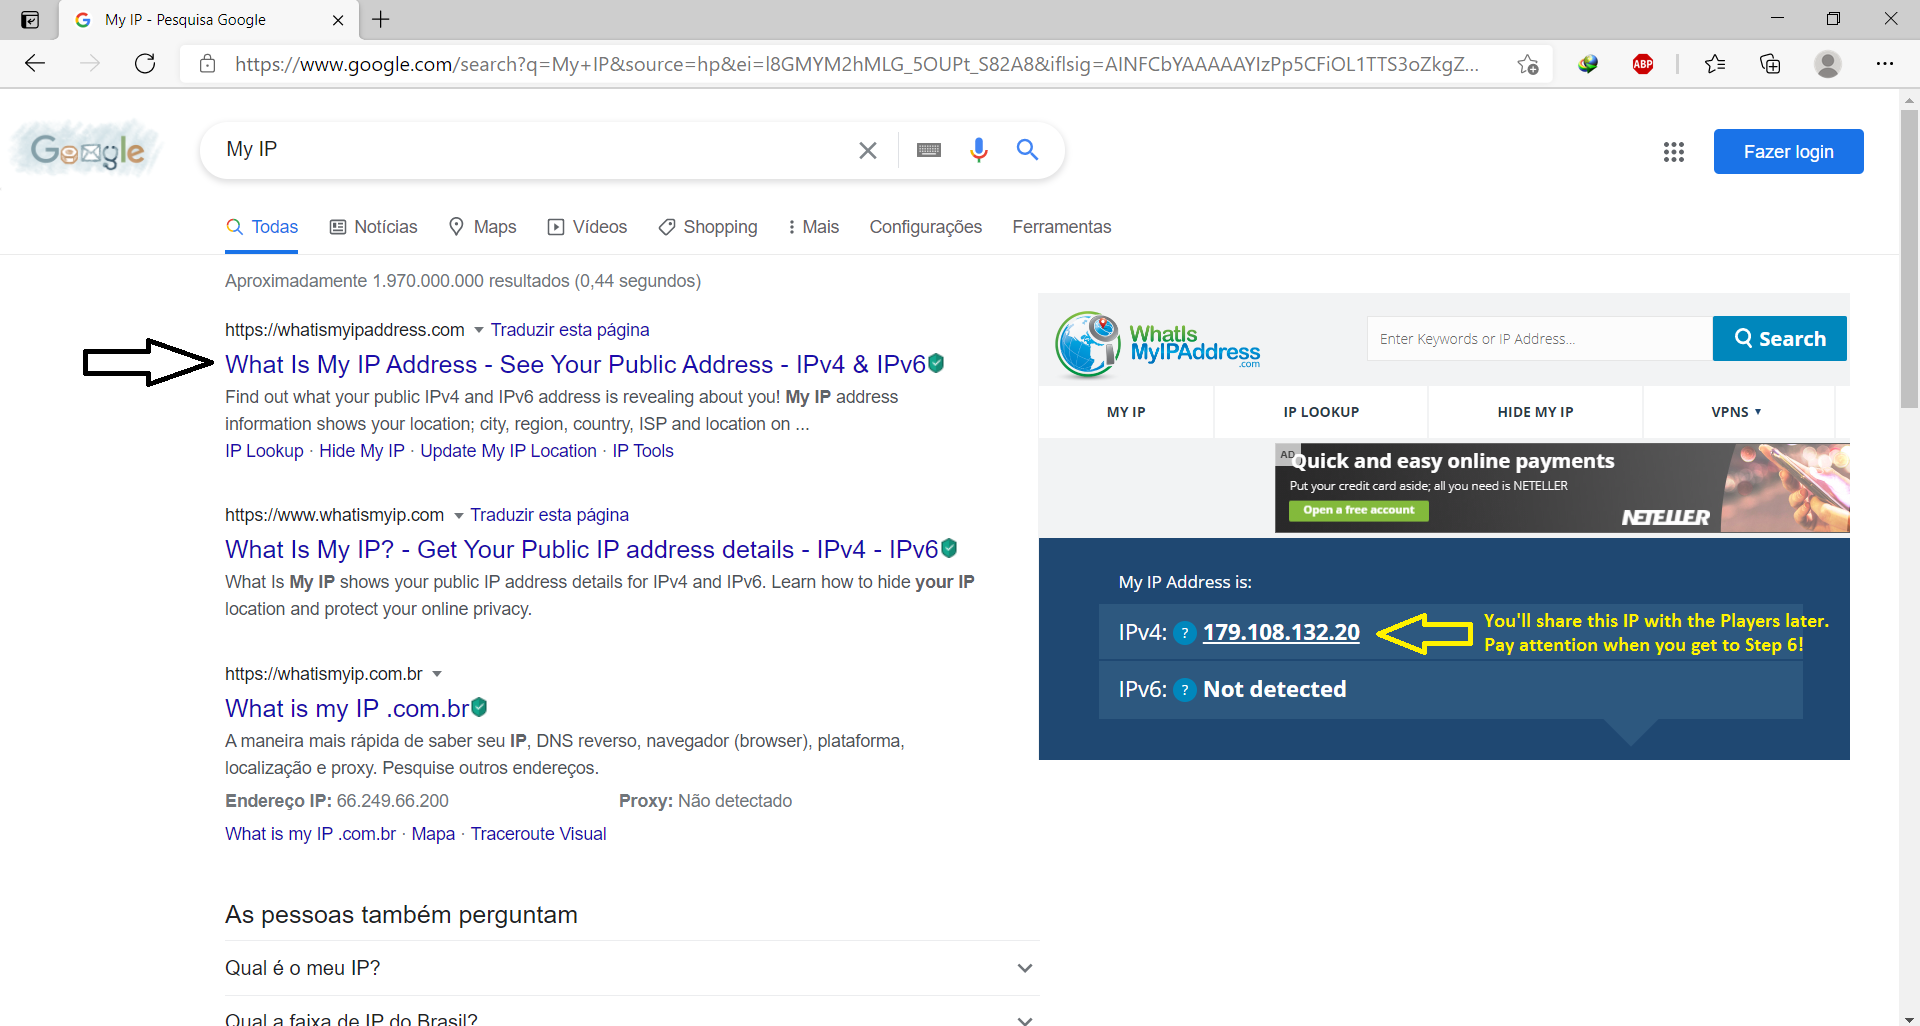
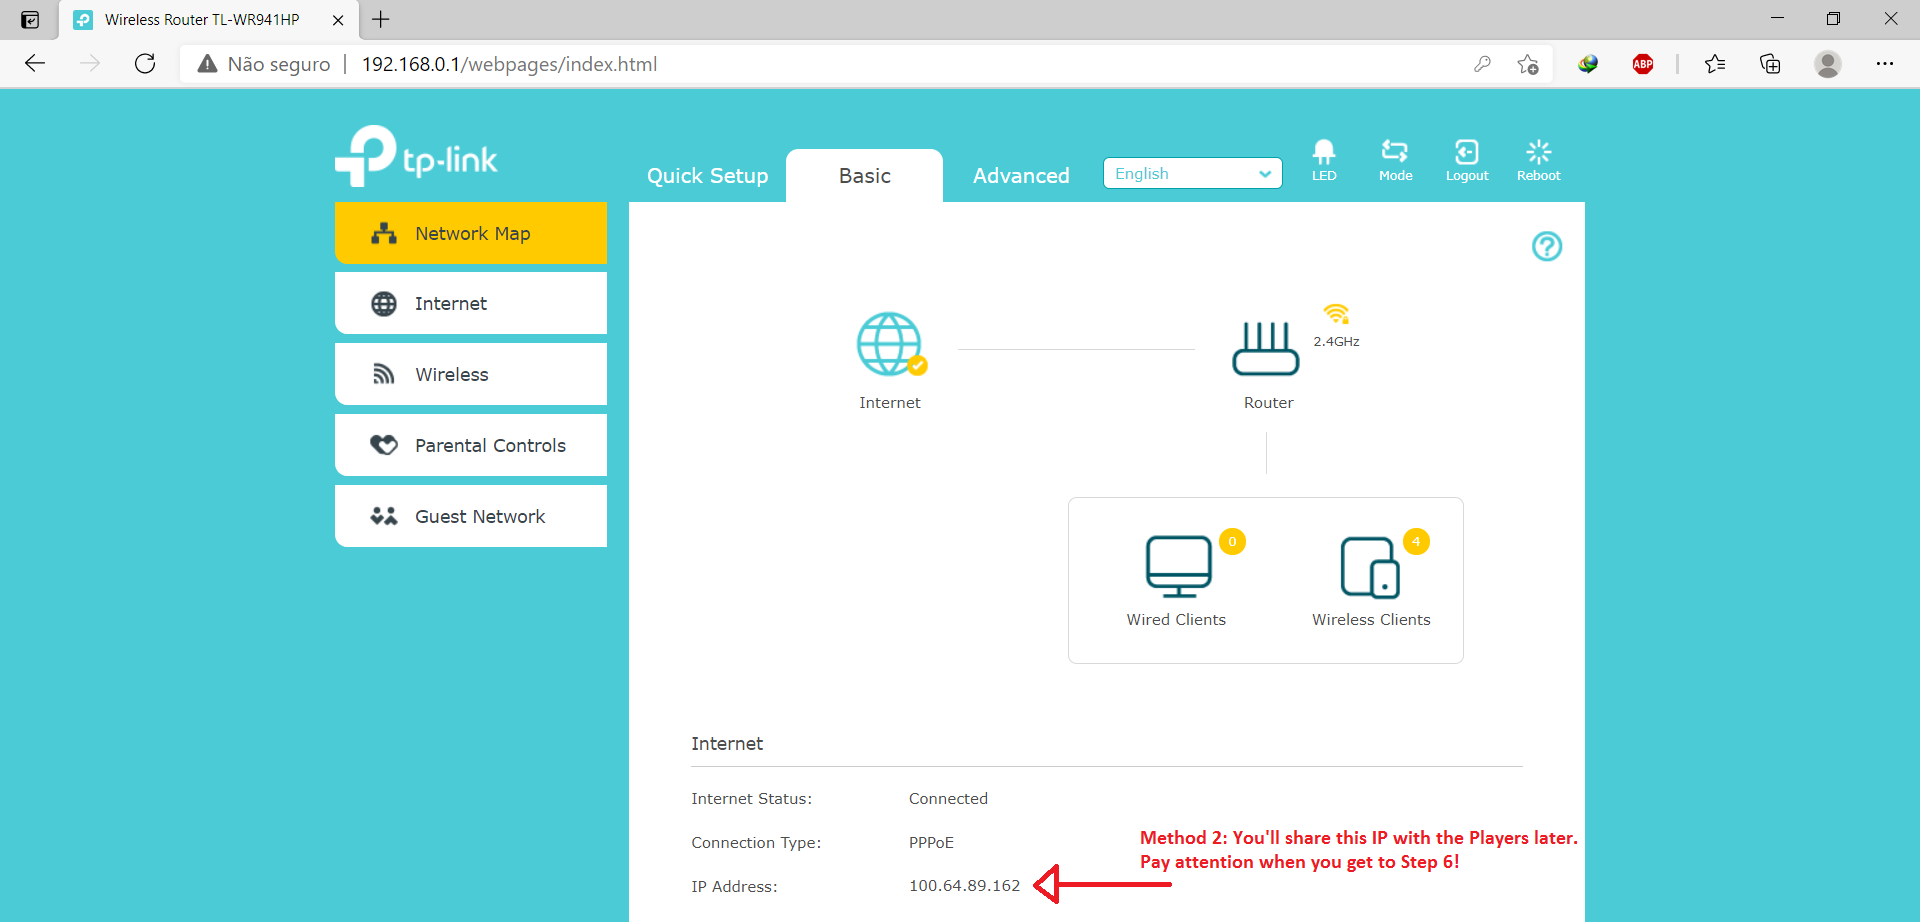
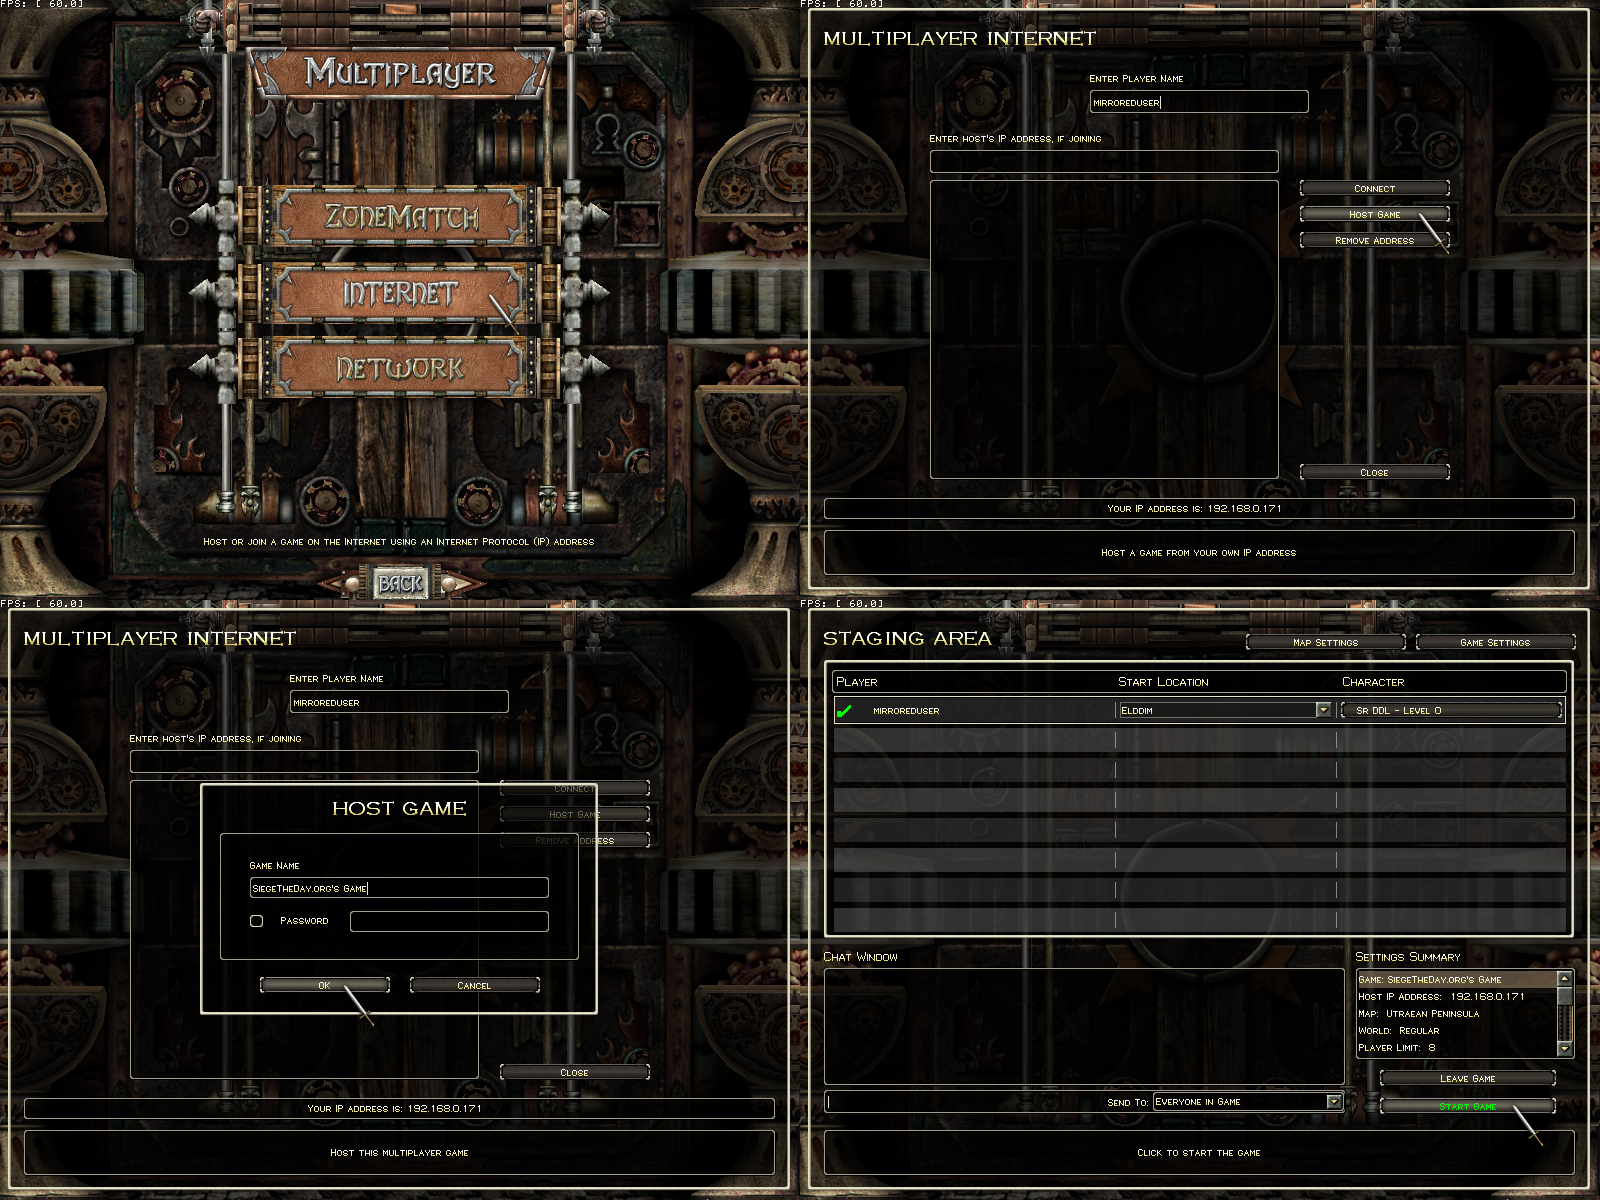
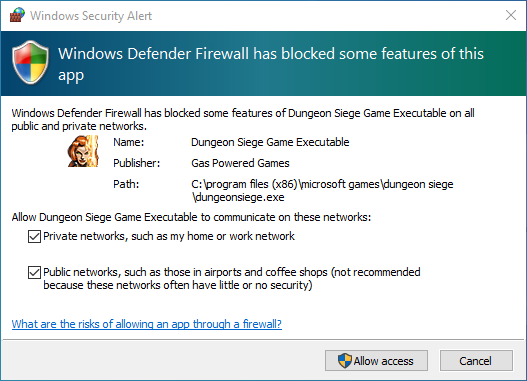
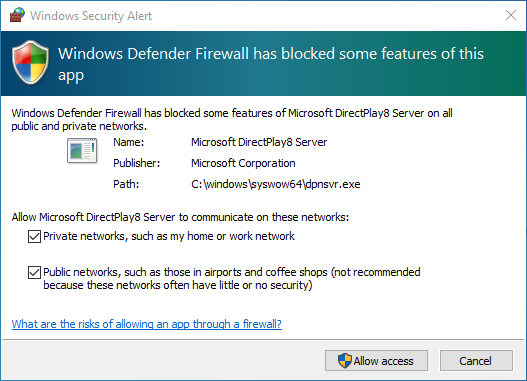
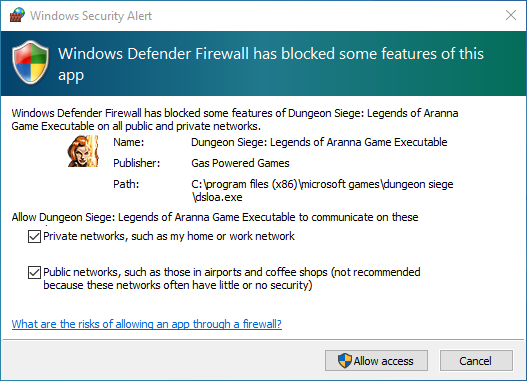
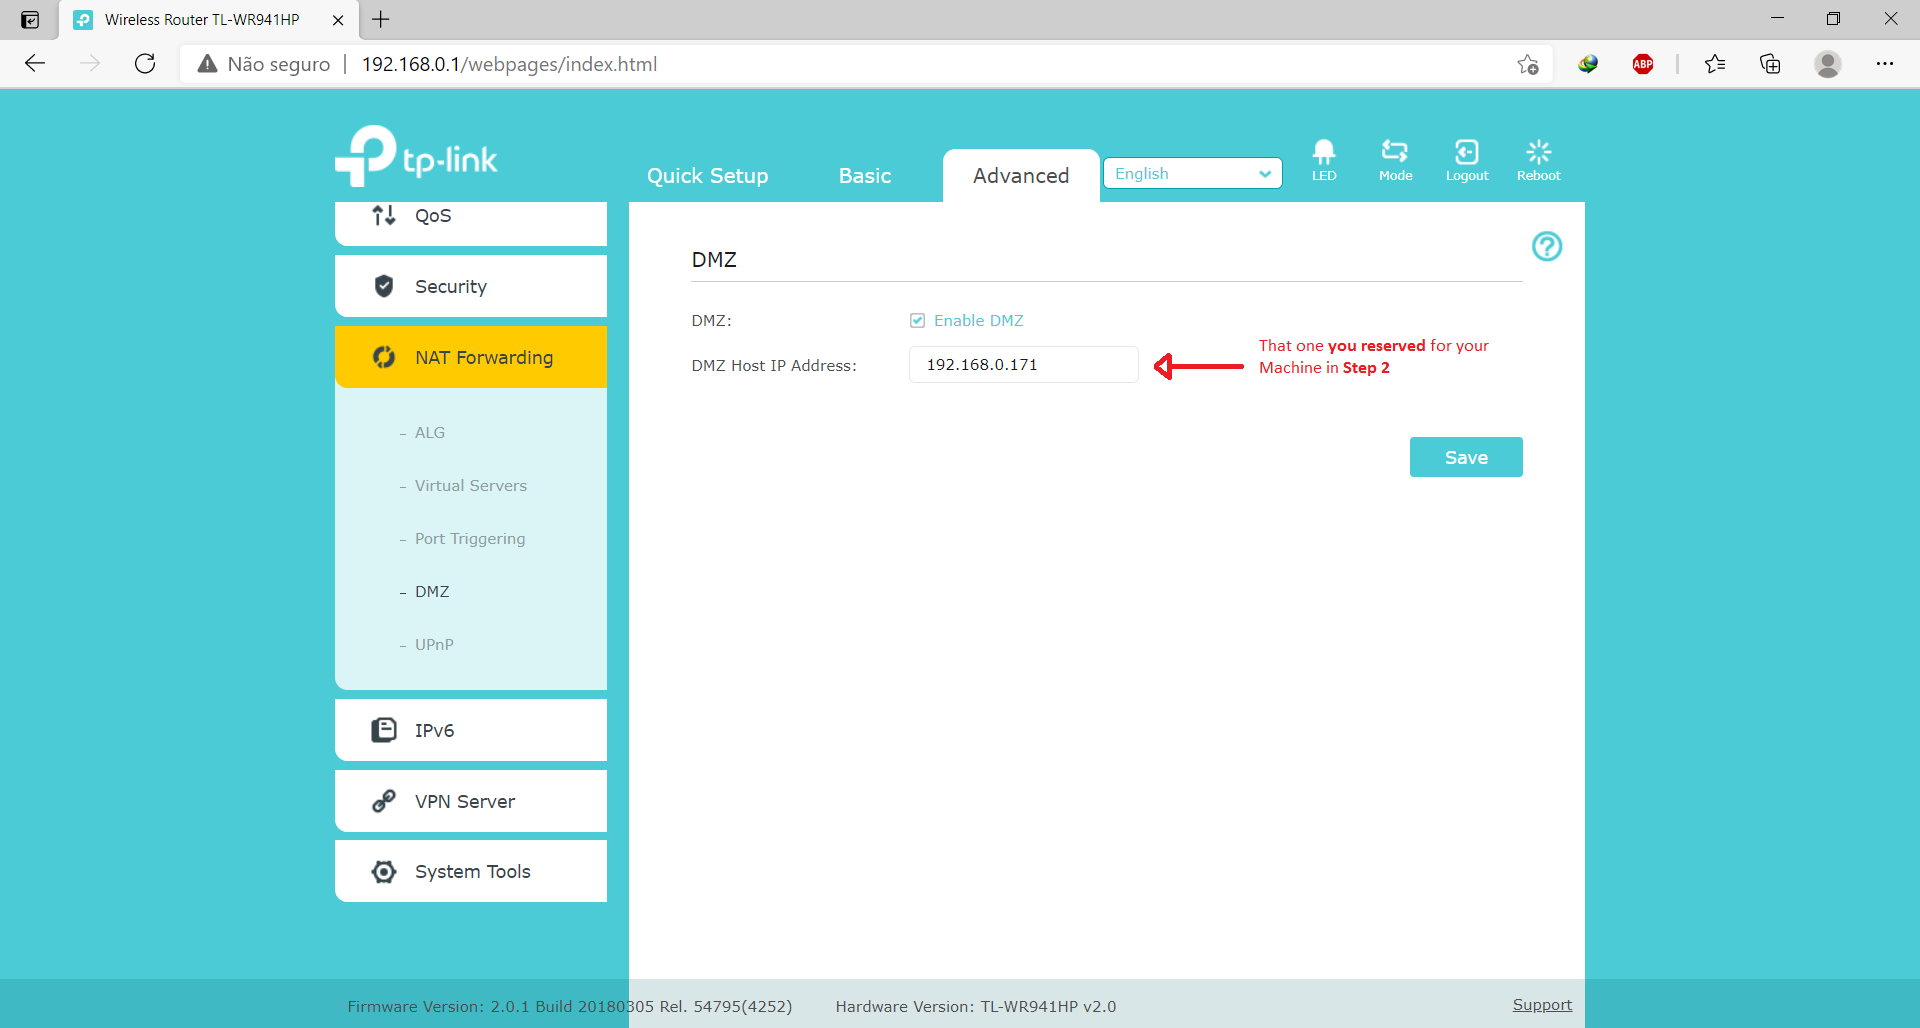
# ResumeWith this Tutorial you'll be able to ‘Host or Join a game on the Internet using an Internet Protocol (IP) Address’ Official method offered by the developers of the Game. Just Follow the tutorial and its images examples For Hosting a Game, read it all. For Joining, go directly to Step 5.2 This is not just another way of playing online. It's about connection quality and a better gaming experience # First things firstSince I’ve been looking for a tutorial here with this subject and I didn't find it, I decide to create one very simple which anyone can follow and do it, step by step. It’s very easy. The concept is universal. In my explanations I'm using a TP-Link TL-WR941hp router. However, independent of the brand/model, the method works with any Router – If you do steps rightly. Divided in 6 steps, the tutorial it looks big but in practice the steps are quickly. # How is this possible?- Direct IP Adress Connection (Does not uses any third party apps) - Dungeon Siege uses Direct Play 8.1 # Pre-requisites- Internet Connection (Host and Players). - DS or DS LOA installed – Same version for the Host and Players. - Your Router's IP address to access the Main Menu and navigate to the Sections: • First, Network > DHCP Server > IP Adress Reservation • Second, NAT Forwarding - Your Public IP Address on the Internet to share it to the players - Game and DirectPlay allowed through Firewall # TUTORIAL - STEPS1 – Accessing and Managing your Router • Follow the instructions below / Check image file ‘Img 1 – Accessing and Managing your Router’ 2 – Accessing Network Management • Follow the instructions below / Check image file: ‘Img 2 – Accessing Network Management’ > NETWORK > DHCP Servers - In this place You'll see the list of all connected devices into your Router. Also you’ll see a field named as, > Address Reservation (Or something else with the same meaning). 3 – Managing NAT Forwarding • Follow the instructions below / Check image files: ‘Img 3.1 – Managing NAT Forwarding’ and ‘Img 3.2 – NAT Forwarding Status’. > NAT Fowarding > Virtual Servers - Select Add and fill in the fields exactly as below: > NAT Fowarding > Port Triggering - Select Add and fill in the fields exactly as below: - In most situations this is enough to players find the Host Created. If it’s not, don't worry, there's one more trick. Wait until we’re testing the server in Step 6. 4 – Identify your Internet Public IP Address - One or other method bellow will work. 4.1 – Method 1 – Googling ‘My IP’ - Last year (2020) this method was the one which was working for me based on my ISP of that time. • Follow the instructions below / Check image file ‘Img 4.1 – M1 – Identify your Internet Public IP Address’ 4.2 – Method 2 – Main Menu of your Router - Nowadays (2021), this is the method which is working based on my new ISP. • Follow the instructions below / Check image file ‘Img 4.2 – M2 – Identify your Internet Public IP Address’ 5 – Allowing DS Game and Direct Play 8.1 through your Firewall - For Hosting, you MUST allow DS_LOA and Direct Play 8.1 through the Firewall. Players, only the Game (Step 5.2). But if the Player will become Host in other situation, it will be necessary to Allow Direct Play 8.1 too. 5.1 – For Hosting (DS and LOA Expansion) • Check immediately the three images, observing them: • First we need to create a Host Game > Multiplayer > Internet > Host Game > Name the Host and click OK. - The screen may minimize (especially with old OS). If doesn't, force it by using ‘CTRL + ESC’ keys. • Remember, to LOA Expansion you’ll have to do the same step above (Img 5.4 – Firewall Settings – LOA). Not to DirectPlay anymore. 5.2 – For Joinning - If you did the step above to create a Host Game, it won't be needed to do this procedure. If you didn't, go ahead. > Multiplayer > Internet > Enter Host’s IP Address > Click on Connect - Your screen may minimize. If doesn't, force it by using the Keys CTRL + ESC. • Do the same procedure if you’re going to play LOA Expansion (Eg. Img 5.4 – Firewall Settings – LOA). 6 – Testing the Created Server - Once your Host Game is created, share your Public IP Address obtained in Step 4 to the players. Share the IP from Method 1 (Step 4.1) first. - Done! The clients will find the created Host Game. - “OMG! Still not working!”. Ok... - To solve this situation, we have to make the Host Machine “more visible” using DMZ. 6.1 Enabling DMZ - As I told you before in Step 3: In most cases all we did so far is enough to play the game Online successfully. However, sometimes, for some unknown reason, it isn’t! Consequence: The players won't find the created server. That’s why DMZ it’s an important tool and should be used. - Enable it temporarily, just to make the players find the host game. Once they're in, you can turn it off – you can turn it off any time even during the game play. Or you can leave it enabled while you're playing. After that, disable it. • Follow the instructions below / Check image file ‘Img 6 – Enabling DMZ’ > NAT Fowarding > DMZ - In the shown field, type the Reserved IP for the Host Machine in Step 2. • Now we’ll test the Host Game with DMZ enabled in two combinations: 1) Ask the players to try to find the server again Using IP Address from Method 1 (4.1). - I guess it Yes (probably). Have a nice play!
# MAIN REFERENCES‘Readme’ file (Topic J. Connectivity Issues, Pages 29 and 30. Located in Default Folder of installation of the game. This reference was the key to find which Port and Protocol DS_LOA uses) and The User Guide of my Router. If necessary, consult yours on the website of the brand of your router. # COMMENTSThe method shown in tutorial above works perfectly for me considering my ISP and Country. I sincerely hope that it works for all users from ‘SiegeTheDay’ community too, independent of ISPs or Countries. Show your modded stuffs in real time, Complete the Campaigns or Do whatever you want in a Multiplayer match through Internet using IP Address. Thank you all for your attention! forums: |
|||||||||||||||||||||||||
|
» |
|||||||||||||||||||||||||

Me and My Friends play online according with the method above.
We're on different cities and states.
=D
This tutorial needs a revision. Me and my friends we're gonna play Online soon. Maybe we'll create a chat on Discord and share the match on it. Or even if someone here wants to play, its very possible. =D
4 or 5 Brazilians playing Online. But the Game allows 8 players maximum.
https://discord.gg/3MvxjdK84c