Coding
This book is for information on coding in Dungeon Siege like e.g. gas and skrit.
Please add and edit existing pages as you see fit (not this one though).
Code snippets
This section of the coding book is for code snippets. The code can be in gas, flick or skrit.
Please note that the snippets are user submitted and have not been tested.
Feel free to submit your own code snippet on a childpage.
Creating A Simple Item - Chain Mail
Creating A Simple Item - Chain Mail
This was written for DS1 but will apply to the other games as well. This tutorial also assumes that you understand about directories in resource files when creating a mod.
Making a simple item helps to understand the bare necessities for more complex ones. Open up any text editor that you want (notepad is fine) and create a new file. Follow these steps to create a simple chain mail using template 1 below as a reference model:
1. Create a template header in the format of [t:template,n:TEMPLATE_NAME] : Replace TEMPLATE_NAME with a unique name of your own. This is used by the game to uniquely identify your item, but is never seen by the normal user.
2. Each new [] tag must be enclosed by a set of braces { } to begin and end each block, so keep that in mind throughout your creation.
3. You'll now want to specificy the doc tag in the format of doc= "TEXT"; : Replace TEXT with any name you wish, it is not the name of your item and will never be seen except by those using the Siege Editor choosing to look at documentation over names.
4. Notice that after each line except those with { } or [] in them, there is always a semi-colon ;. Your item will not compile right if you forget one.
5. All your items will need some type of base specialization in the format of specializes = SPEC : Replace SPEC with a template name of your choice. In our case we would use base_body_armor_chain and a complete list of commonly used ones will be available in a later section.
6. Common to all armor is the defend tag. It is always specified by [defend]. It is also the most important part of the armor in which you specify the armor defense as well as the mesh style and texture.
7. First inside the defend tag you'll need to specify armor_style = TEXTURE; : Replace TEXTURE with the name of that which you want. In our example we will use the one for Dark Scale.
8. Second inside the defend tag you'll need to specify armor_type = MESH_TYPE; : Replace MESH_TYPE with the name of the armor type mesh you want. This must correspond with the texture you are using as well, or it will not wrap right on the character. For simplicity we will use a3, which goes with our 018 texture for Dark Scale.
9. Last inside the defend tag you need to specify a defense rating by f defense = DEF; : Replace DEF with the amount of defense you want on the armor.
10. Next is the common tag which is always specified as [common]. It includes a few details, but is mostly used for naming the item.
11. Inside the common tag you will need to specify the screen_name = "NAME" of your item. This is the name that shows up to the user in game. : Replace NAME with any name you wish, it does not have to be unique to the item also.
12. The most visually important tag is the gui one, which is specified by [gui]. It containts all the information about displaying the object other than on the actual character model.
13. Now the requriements to equip your weapon are in the form of equip_requirements = TYPE:VALUE; : Replace TYPE with the attribute (strength, dexterity, intelligence) and VALUE with the amount to require. You can also require multiple attributes by seperating each with a , as I've done below.
14. The inventory_height = VALUE; and inventory_width = VALUE; are very important attributes that set how much inventory space your item will take up. It is best to use a general guess value and then change it if needed later. : Replace VALUE in both cases as needed. Setting to a low value does not resize the icon for the inventory and creates wierd looking results. In this case, I know the Dark Scale icon of the armor is 3 x 2 already, so use it.
15. Lastly, an inventory icon needs to be specified in the form of inventory_icon = GRAPHIC;. This is the actual icon for your inventory and equip slot that shows up. : Replace GRAPHIC with the name of the inventory graphic. In our case use b_gui_ig_i_a_pos_a3_018 which is the one for Dark Scale. The ending number usually, but not always, matches up to the texture we used above with the default game grahpics.
16. You have now completed the code for a very simple chain mail that the game uses. You'll need to save it as a .gas file in your items directory you created in Part 1 of the tutorial (Figure 3.2). It must be in this directory and saved with a .gas extension. The name of the file otherwise is unimportant, but should be unique.
17. The last step is to tank the directory. Go here for instructions: Handling tanks and resource directories.
[t:template,n:nivisec_simple_chain_mail]
{
	doc = "Dark Chain Mail";
	specializes = base_body_armor_chain;

	[defend]
	{
		armor_style = 018;
		armor_type = a3;
		f defense = 128;
	}
	[common]
	{
		screen_name = "Dark Chain Mail";
	}
	[gui]
	{
		equip_requirements = strength:21;
		inventory_height = 3;
		inventory_width = 2;
		inventory_icon = b_gui_ig_i_a_pos_a3_018;
	}
}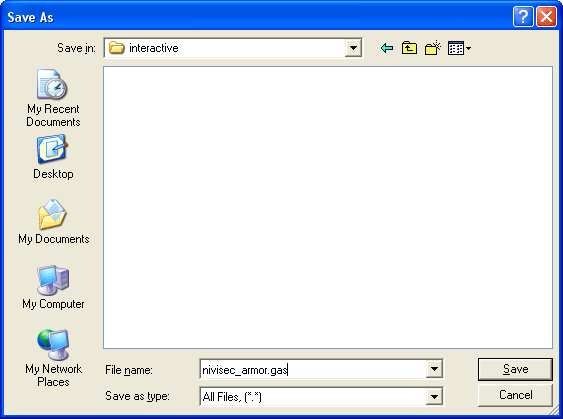
figure 1
(the original text for this tutorial was written by Nivisec, and is published here with permission)
Creating A Simple Item - Sword
Creating A Simple Item - Sword
(This was written for DS1 but will apply to the other games as well)
Making a simple item helps to understand the bare neccessities for more complex ones. Open up any text editor that you want (notepad is fine) and create a new file. Follow these steps to create a simple sword using the template (template 1) below as a reference model:
1. Create a template header in the format of [t:template,n:TEMPLATE_NAME] : Replace TEMPLATE_NAME with a unique name of your own. This is used by the game to uniquely identify your item, but is never seen by the normal user.
2. Each new [] tag must be enclosed by a set of braces { } to begin and end each block, so keep that in mind throughout your creation.
3. You'll now want to specificy the doc tag in the format of doc= "TEXT"; : Replace TEXT with any name you wish, it is not the name of your item and will never be seen except by those using the Siege Editor choosing to look at documentation over names.
4. Notice that after each line except those with { } or [] in them, there is always a semi-colon ;. Your item will not compile right if you forget one.
5. All your items will need some type of base specialization in the format of specializes = SPEC : Replace SPEC with a template name of your choice. In our case we would use base_sword and a complete list of commonly used ones will be available in a later section.
6. Moving to the first inside tag of the item, it is aspect. Here we will deal with things like mesh specification, values, textures, etc. It is specified by the [aspect] tag always.
7. Inside the aspect tag are assignments just as before. In our case we will be using only model = MESH_NAME : Here you would replace MESH_NAME with one of the known in-game meshes. A list will be available in a later section, but for now use m_w_swd_055, which is the Dragon Wing sword mesh.
8. Common to all weapons is the attack tag. It is always specified by [attack]
9. Inside the attack tag you can specify the minimum and maximum amount of damage of the weapon, using f damage_max = DAM and f damage_min = DAM : Replace DAM the amount you wish the sword to do.
10. Next is the common tag which is always specified as [common]. It includes a few details, but is mostly used for naming the item.
11. Inside the common tag you will need to specify the screen_name = "NAME" of your item. This is the name that shows up to the user in game. : Replace NAME with any name you wish, it does not have to be unique to the item also.
12. The most visually important tag is the gui one, which is specified by [gui]. It containts all the information about displaying the object other than on the actual character model.
13. You must specify an active_icon = NAME; This is the small icon that appears beside a characters portrait on the screen when the weapon is equipped. : Replace NAME with the picture b_gui_ig_i_ic_swd_005, which again is the default for the Dragon Wing sword. A detailed list of those available will be given later.
14. Now the requriements to equip your weapon are in the form of equip_requirements = TYPE:VALUE; : Replace TYPE with the attribute (strength, dexterity, intelligence) and VALUE with the amount to require. You can also require multiple attributes by seperating each with a , as I've done below.
15. The inventory_height = VALUE; and inventory_width = VALUE; are very important attributes that set how much inventory space your item will take up. It is best to use a general guess value and then change it if needed later. : Replace VALUE in both cases as needed. Setting to a low value does not resize the icon for the inventory and creates wierd looking results. In this case, I know the Dragon Wing icon of the sword is 4 x 1 already, so use it.
16. Lastly, an inventory icon needs to be specified in the form of inventory_icon = GRAPHIC;. This is the actual icon for your inventory and equip slot that shows up. : Replace GRAPHIC with the name of the inventory graphic. In our case use b_gui_ig_i_w_swd_088 which is the one for the Dragon Wing sword. A list will be available in a later section.
17. You have now completed the code for a very simple sword that the game uses. You'll need to save it as a .gas file in your items directory you created in Part 1 of the tutorial (Figure 1). It must be in this directory and saved with a .gas extension. The name of the file otherwise is unimportant, but should be unique.
18. The last step is to tank the directory. Go here for instructions: Handling tanks and resource directories.
[t:template,n:nivisec_simple_sword]
{
	doc = "Dragon Lords Sword";
	specializes = base_sword;
	[aspect]
	{
		model = m_w_swd_055;
	}
	[attack]
	{
		f damage_max = 407;
		f damage_min = 307;
	}
	[common]
	{
		screen_name = "Steel of the Dragon Lords";
	}
	[gui]
	{
		active_icon = b_gui_ig_i_ic_swd_005;
		equip_requirements = strength:30, dexterity:45;
		inventory_height = 4;
		inventory_width = 1;
		inventory_icon = b_gui_ig_i_w_swd_088;
	}
}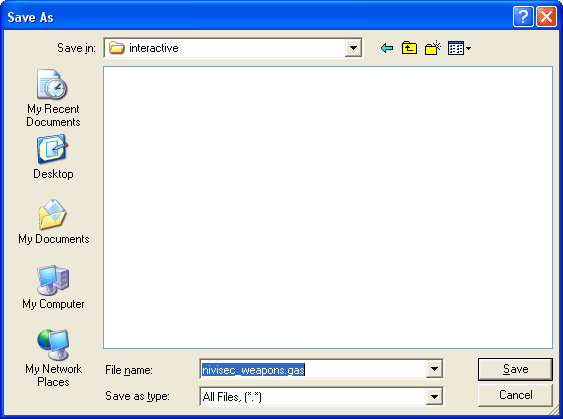
figure 1
(the original text for this tutorial was written by Nivisec, and is published with permission)
Making Your Items For Sale In Regular Skill - Elddim Blacksmith
Making Your Items For Sale In Regular Skill - Elddim Blacksmith
After you have created your item(s) you will want to have a easy way of testing them. For this step, you will need npc_blacksmith.gas to edit. Note that it is edited by me(Nivisec) to remove all other items sold by the smith besides the ones we add. If this is not done, you risk the chance of your templates not always showing up in the list. Please download it and have it handy:
1. First, we need to make a new directory under the base directory with the items you want to have available at the blacksmith. It is in the form of /world/contentdb/templates/regular/actors/good/npc. Make sure to use the same base directory as you did for the items. See figure 1 as an example.

NPC directory.
figure 1
2. Open up your npc_blacksmith.gas and look/search for the template part named [t:template,n:blacksmith_zabar_treseck] (figure 2).
3. Now we shall insert all the item templates we have created in game. Take notice of the structure mainly at this point and how the items are sold in it. Notice [inventory], [store_pcontent], [TAB_NAME]. There currently is no tab named [our_items], so we must insert it (Figure 4.2). Don't forget to enclose it with the { and } characters. The tab name is not important, the game sorts the items into the appropriate place automatically.
4. We are interested only in having the smith sell our new items, so we create a new header of [all*], which basically tells the smith to sell everything underneath this tag (figure 2). You must create a new [all*] tag for each template item.
5. Now we will insert our created items in the form of il_main = #TEMPLATE_NAME; under our [all*] tag. We will replace TEMPLATE_NAME of course with the names of the templates we created. In my case, I named them nivisec_simple_sword and nivisec_simple_chain_mail. For general testing, you may also give each item an optional power range to apply modifiers on the item when sold. It is places in the form of il_main = #TEMPLATE_NAME/POW_MIN-POW_MAX;. Again reaplce TEMPLATE_NAME and POW_MIN with the minumum power area and POW_MAX with the maximum power area. In general, if you want to randomly choose any and all modifiers in the game use 1-2500 (figure 2).
6. Last you will need to specify a min and max amount of items to show in the shop. It is important you put at least a min = 10; max = 10; here, because some item templates will not appear without a decent number specified. It is a bug in the game, especially with weapon templates when set to use a magic prefix/suffix like below.
7. If you wish for your item to for sure appear 100% of the time, you can look for the [store] tag and then insert a new block called [item_restock].
8. Note that you can not specifiy any magic parameters, it just uses the base template with no additions. You use the form of TEMPLATE_NAME = STOCK_NUM;. Here you will replace TEMPLATE_NAME with the name of your template(s) and STOCK_NUM is the number of this template you want 100% for sure stocked in the smith's item set.
[t:template,n:blacksmith_zabar_treseck]
{
	category_name = "1W_shopkeep";
	doc = "blacksmith, elddim (MP)";
	specializes = base_npc_bs;
	[actor]	{portrait_icon = b_gui_ig_i_ic_c_foulton;}
	[aspect]
	{
		model = m_c_gbn_bk_pos_1;
		[textures] { 0=b_c_gbn_bs-02; }
	}
	common:screen_name = "Blacksmith Zabar Treseck";
	[inventory]
	{
		[store_pcontent]
		{
			full_ratio = 1;
			[our_items]
			{
				[all*]
				{
					il_main = #nivisec_simple_chain_mail;
					max = 10;
					min = 10;
				}
				[all*]
				{
					il_main = #nivisec_simple_sword/1-2500;
					max = 10;
					min = 10;
				}
			}
			[armor]
			{
				[all*]
				{
					il_main = #body/1-8;
					max = 10;
					min = 10;
				}
				[all*]
				{
					il_main = #body/20-41;
					max = 4;
					min = 4;
				}
				[all*]
				{
					il_main = #boots/1-12;
					max = 8;
					min = 8;
				}


				[all*]
				{
					il_main = #gloves/1-12;
					max = 8;
					min = 8;
				}
				[all*]
				{
					il_main = #helm/1-12;
					max = 8;
					min = 8;
				}
				[all*]
				{
					il_main = #boots/25-35;
					max = 4;
					min = 4;
				}
				[all*]
				{
					il_main = #gloves/25-35;
					max = 4;
					min = 4;
				}
				[all*]
				{
					il_main = #helm/25-35;
					max = 4;
					min = 4;
				}
			}
			[shields]
			{
				[all*]
				{
					il_main = #shield/1-10;
					max = 8;
					min = 8;
				}
				[all*]
				{
					il_main = #shield/10-16;
					max = 4;
					min = 4;
				}
				[all*]
				{
					il_main = #shield/25-35;
					max = 4;
					min = 4;
				}

			}
			[weapons]
			{
				[all*]
				{
					il_main = #melee/1-6;
					max = 15;
					min = 15;
				}
				[all*]
				{
					il_main = #melee/15-20;
					max = 4;
					min = 4;
				}
				[all*]
				{
					il_main = #ranged/1-6;
					max = 15;
					min = 15;
				}
				[all*]
				{
					il_main = #ranged/15-20;
					max = 4;
					min = 4;
				}
			}
		}
	}
	[store]
	{
		item_markup = 2;
		[item_restock]
		{
			nivisec_simple_chain_mail = 3;
			nivisec_simple_sword = 3;
		}
	}
}
//CUT OFF FOR VIEWING PURPOSES, DO NOT DELETE THE OTHER INFORMATIONBlacksmith Template
9. Now there is only one thing left to do. Save this file in the directory structure you have made under your base directory. It is very important that you save in the npc directory and use the exact file name as you downloaded it as (npc_blacksmith.gas) or it will not work. Also, it will not work if you remove anything from the file! Do not delete any lines (figure 3).
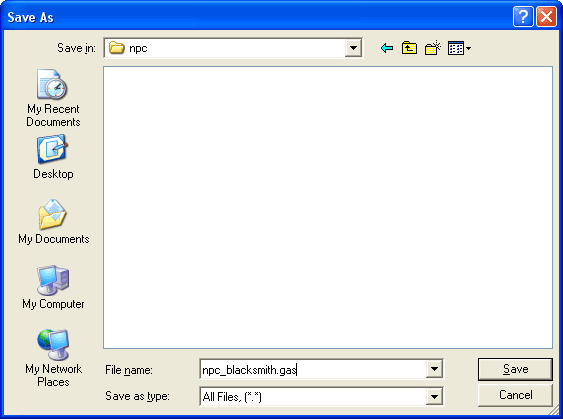
Saving the gas file in npc directory
figure 3
10. Now tank the filestructure, put the new mod in the Resource directory and go do some shopping.
(the original text for this tutorial was written by Nivisec, and is published here with permission)
Adding Your Items To The PCONTENT Pool (Random Drops/Sellings at Vendors)
Adding Your Items To The PCONTENT Pool (Random Drops/Sellings at Vendors)
We will use the Simple Sword template, from the Creating A Simple Item - Sword tutorial, and modify it here. All items are added to pcontent the same way:
1. First we need to specify an optional type of pcontent drop under the [common] block. If you do not include this line, it defaults to dropping only "normal". It is in the form of pcontent_special_type = TYPE(S);. You can replace types with rare, unique, and/or normal. Each one seperated by a comma if you include more than one type.
2. Next we have the introduction of the new block [pcontent]. It is here you will define the randomization levels of your item.
3. Inside of the pcontent block you will need to create a [base] block.
4. Now we must specify f modifier_max = #; and f modifier_min = #;. It's hard to give a good rule of thumb for this, but do not confuse these values with the other power modifiers we used earlier in the blacksmith editing. These define more of where things drop in the game and how good of modifiers can go onto that item. You obviously replace # with two numbers, making sure min is less than or equal to max or the game will crash.
5. Your item is now in the pcontent pool once you save and recompile your mod. It will show up randomly on the types you specified at the vendors/smiths and off monsters.
6. To not leave you hanging on defining a good min/max, I have some examples.
max = 0, min = 0 will make the item drop anywhere in the game pretty much with terrible modifiers.
max = 87, min = 63 will make your item drop mainly in elite skill near the end of it in grescal or chicken level but not before that.
Anything with a min above 30 will likely not show up in regular skill at all.
Anything with a min above 50 will likely not show up in veteran skill at all.
max = 81, min = 47 is the ever famous dragon wing sword's pcontent levels.
max = 270, min = 11 is from the Noble Vesture, 113 Armor cloth body piece.
max = 9, min = 4 is from the Black Widow Helmet
max = 33, min = 9 is from serpentine scale, which drops unique only.
[t:template,n:nivisec_simple_sword]
{
	doc = "Dragon Lords Sword";
	specializes = base_sword;
	[aspect]
	{
		model = m_w_swd_055;
	}
	[attack]
	{
		f damage_max = 407;
		f damage_min = 307;
	}
	[common]
	{
		pcontent_special_type = rare, unique, normal;
		screen_name = "Steel of the Dragon Lords";
	}
	[gui]
	{
		active_icon = b_gui_ig_i_ic_swd_005;
		equip_requirements = strength:30, dexterity:45;
		inventory_height = 4;
		inventory_width = 1;
		inventory_icon = b_gui_ig_i_w_swd_088;
	}
	[pcontent]
	{
		[base]
		{
		  f modifier_max = 14.000000;
		  f modifier_min = 7.000000;
		}
	}
}template 1
(the original text for this tutorial was written by Nivisec, and is published here with permission)
Assigning a Pre-Set Minimum Gold Value To Your Item
Assigning a Pre-Set Minimum Gold Value To Your Item
We will use the Simple Sword template, from the Creating A Simple Item - Sword tutorial, and modify it here. All items are assigned gold values the same way:
1. Under the [aspect] block we will assign a new field that is simply gold_value = AMOUNT;. Replace AMOUNT with the miniumum amount of gold you want your item to be worth when generated.
[t:template,n:nivisec_simple_sword]
{
	doc = "Dragon Lords Sword";
	specializes = base_sword;
	[aspect]
	{
		model = m_w_swd_055;
		gold_value = 1000;
	}
	[attack]
	{
		f damage_max = 407;
		f damage_min = 307;
	}
	[common]
	{
		pcontent_special_type = rare, unique, normal;
		screen_name = "Steel of the Dragon Lords";
	}
	[gui]
	{
		active_icon = b_gui_ig_i_ic_swd_005;
		equip_requirements = strength:30, dexterity:45;
		inventory_height = 4;
		inventory_width = 1;
		inventory_icon = b_gui_ig_i_w_swd_088;
	}
	[pcontent]
	{
		[base]
		{
		  f modifier_max = 14.000000;
		  f modifier_min = 7.000000;
		}
	}
}template 1
(the original text for this tutorial was written by Nivisec, and is published here with permission)
Having Your Item Not Be Part Of The PCONTENT Pool
Having Your Item Not Be Part Of The PCONTENT Pool
We will use the Simple Sword template, from the Creating A Simple Item - Sword tutorial, and modify it here. All items are assigned this value the same way:
1. Under the [common] block we will assign a new field that is is_pcontent_allowed = false;. Set this to true or false depending on if you want your item to be able to be considered for the pcontent pool. That means wether or not the monsters will drop it and the smiths will sell it randomly. If you set this to false, your item will never drop in the game unless you assign it to drop by force (addressed in a later tutorial).
[t:template,n:nivisec_simple_sword]
{
	doc = "Dragon Lords Sword";
	specializes = base_sword;
	[aspect]
	{
		model = m_w_swd_055;
		gold_value = 1000;
	}
	[attack]
	{
		f damage_max = 407;
		f damage_min = 307;
	}
	[common]
	{
		is_pcontent_allowed = false;
		pcontent_special_type = rare, unique, normal;
		screen_name = "Steel of the Dragon Lords";
	}
	[gui]
	{
		can_sell = false;
		active_icon = b_gui_ig_i_ic_swd_005;
		equip_requirements = strength:30, dexterity:45;
		inventory_height = 4;
		inventory_width = 1;
		inventory_icon = b_gui_ig_i_w_swd_088;
	}
	[pcontent]
	{
		[base]
		{
		  f modifier_max = 14.000000;
		  f modifier_min = 7.000000;
		}
	}
}template 1
(the original text for this tutorial was written by Nivisec, and is published here with permission)
Making Your Item Un-sellable to Smiths/Vendors
Making Your Item Un-sellable to Smiths/Vendors
We will use the Simple Sword template, from the Creating A Simple Item - Sword tutorial, and modify it here. All items are assigned this value the same way:
1. Under the [gui] block we will assign a new field that is can_sell = false;. Set this to true or false depending on if you want your item to be able to be sold to NPCs.
[t:template,n:nivisec_simple_sword]
{
	doc = "Dragon Lords Sword";
	specializes = base_sword;
	[aspect]
	{
		model = m_w_swd_055;
		gold_value = 1000;
	}
	[attack]
	{
		f damage_max = 407;
		f damage_min = 307;
	}
	[common]
	{
		pcontent_special_type = rare, unique, normal;
		screen_name = "Steel of the Dragon Lords";
	}
	[gui]
	{
		can_sell = false;
		active_icon = b_gui_ig_i_ic_swd_005;
		equip_requirements = strength:30, dexterity:45;
		inventory_height = 4;
		inventory_width = 1;
		inventory_icon = b_gui_ig_i_w_swd_088;
	}
	[pcontent]
	{
		[base]
		{
		  f modifier_max = 14.000000;
		  f modifier_min = 7.000000;
		}
	}
}template 1
(the original text for this tutorial was written by Nivisec, and is published here with permission)
Shiny sword in DS2? (how to use shaders)
In the demo movie clip for DS2 (the long one narrated by Chris Taylor) I remember there being two special swords... one of which had a reflective appearance (shaders?). Having played the game now, I can't say I've seen anything "shiny" in the game other than water. :?
Has anyone seen a shiny sword (or any reflective surface other than water) in DS2?
Understanding the NNK
Well, the first thing you have to understand is that the game uses the NNK to know where to find meshes, animations, and textures. The NNK is basically a list of directories and directory trees that the game executable uses to look up a filename, and figure out where that file is stored.
For example, Farmgirl's face skins are found in the folder art\bitmaps\characters\good_a_heroes\farmgirl\
So, if we were looking for b_c_gah_fg_skin_01, we would find it under this folder.
Now, note the name - it begins with b_c_gah_fg. This is what the game looks at, and compares with the listing in the NNK to see where to find this file when it is called by a template or a skrit.
In the NNK, the entry that tells the game to look in art\bitmaps\characters\good_a_heroes\farmgirl\ for Farmgirl's face skins looks like this:
TREE = B_C_GAH_FG , Farmgirl , "Farmgirl"
Notice that the first part is B_C_GAH_FG. Again, this is what the game looks up. It finds a match, and knows to look in the Farmgirl folder.
Now, this isn't just something that comes out of the blue - earlier entries in the NNK define the tree all the way down to that folder, like so:
TREE = B, Bitmaps, "Bitmaps"
TREE = B_C , Characters , "Characters"
TREE = B_C_GAH , Good_A_Heroes , "Good A Heroes"
TREE = B_C_GAH_FG , Farmgirl , "Farmgirl"
And thus, by looking at the filename and referencing it with the file tree data in the NNK, the game is able to find any file that it needs to find - assuming you put it in the right place. 
Adding to the NNK:
Now, let us suppose for a moment that you have created a new monster called the "Nose Goblin". You have decided that textures for it will be under your own folder, \myspecialmonsters, and you have placed that folder like so:
art\bitmaps\myspecialmonsters\nosegoblin\
What you would then do is create a new NNK file that will be loaded in addition to the existing NNK. This file can be named anything you like, but must end with the NNK extension, and must be stored under the \art folder so the game can find it. So, for example, we might create a new file called mystuff.nnk, and store it under the \art folder.
Having done this, we then create entries in the new file to add the NNK items we want. In the case of our "Nose Goblin", above, we would add entries that look like this to be able to access his textures in the correct folder:
TREE = B_MSM , myspecialmonsters , "My Special Monsters"
TREE = B_MSM_NG , nosegoblin , "Nose Goblin"
Then, all we have to do is make sure all the textures our Nose Goblin uses all begin with B_MSM_NG (such as b_msm_ng_01.raw), and are stored under art\bitmaps\myspecialmonsters\nosegoblin\
Note also that you do not necessarily have to create a new NNK file - you can simply add the original NNK to your mod, open it, scroll down to the bottom, paste in your new tree additions, and tank it up as part of your mod.
And that's all there is to the NNK. :thumbup:
(originally posted by Xaa)